Sunday 30 October 2011

Generator Complex game

I am back and after two weeks of working in Flash, I have finally finished my game.


The idea based for this game is to get a battery and place it into a generator without hitting any obstructions. If you get the battery into the generator, you win the level and you will be given the option to progress onto the next level, retry the level you played or go back to the main menu. Hitting an obstacle will cause you to fail the level and gives you the option to retry the level or go back to the main menu. There are currently ten levels to play and get harder as you progress.

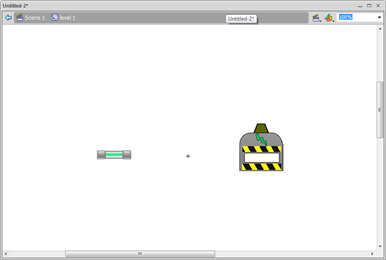
The controls for the game are very simple: one left click over the battery and it will pick it up automatically. the battery will follow the cursor wherever you control it as long as you don't hit any obstacles.

As of now, there are lots of things that it lacks for it to be very well made and addictive game, mainly certain features that it is missing. In this case, it doesn't have a stopwatch in place to record a players time for each level or a life-point feature to record how many times the battery can get hit before it's game over There is also no sound applied to the game, so there won't be as much 'feel' to the game. If I had more time and the right resources, I would definitely add them in. 

That's all for now. Until next time...

Friday 21 October 2011

The Hardest thing I've done before... (Flash Game - Generator Complex - Production)

After much time of practice and game tests using ActionScript 3 in Adobe Flash, I am ready to start creating my game. I have already designed some of the levels and imported them into Flash. So far, I am really proud of the result:
All I have for the main menu at the moment is a game title and three buttons, though only two of them work at the moment. The Play button goes straight into the game, starting from level one and the Levels button shows a list of the playable levels. I am intending to have ten playable levels, but so far, I have finished three of them for alpha-testing before going any further.

Here is the first level. The objective of the game is to get the green battery to the generator, without hitting any obstacles. If you hit an obstacle, the game is over. When this happens, a mini-menu will pop up, giving you the option to either retry the level again or return to the main menu. If you manage to get the battery to the generator, you complete the level and a pop up menu will appear. It gives you the same options as the game over menu, but you will also have the option to proceed onto the next level.

There may be a few bugs that I need to fix. One at the moment, is the hit test between the battery and the generator: I have made so that no matter where the battery touches the generator, it will automatically count as a hit and win the game.

I will hopefully be back more on my game. Until next time...

Wednesday 19 October 2011

(Drop and Drag - Game Test)

Hello again, I am back with some game testing:

Like the practice go’s in Flash, I think I’m ready start my game. But first, I need to make a basic bare-bones game. Let’s make a small menu:


Here, I have opened Flash. Now I need to draw a simple square:


This is basically going to be our Start button but for it to work, I need to convert it to a Symbol. Left-click and scroll down to Convert to Symbol. Give it a name (this will be saved in the Library) and make sure it’s a Button. You should have this pop-up:


Give it an Instance name:


And finally, some coding:


That is your start button but the coding is basically saying “that you are going into another frame when you click the button, so you need to add that frame. To do this, go into the Timeline and left-click in an empty frame and add a Blank Keyframe. You should have something like this:


This will give you a blank canvas to work with but you’ll still have your Menu. Now it’s time for my game. What I did first was create an empty Symbol (movie clip). Go to Insert > New Symbol:


You should have a “new” blank canvas. At this point, I imported some graphics. I did this by going to File > Import > Import to Library, and then I selected the sprites wanted in my game. Here’s what I have:


Go back to Scene 1, and then go into your library and drag you symbol on to stage and then double click it so you are now inside it. I then converted these shapes into symbols (movie clips) and gave them Instance Names (The battery thing > Battery1 and the generator thing > Gen1) Then I added this coding into the ActionScript:


This coding means that I can pick up and drag the battery along and once it touches the generator, it will go to the next frame. In the second frame, it will have a an animated graphic in a Blank Keyframe:


I positioned this so it is in the same place as the previous generator. I converted this into a Symbol, (movie clip) and then double-clicked it to go inside the symbol. I them finally added a tween. (the light above the generator)

That's about it for now. Until next time...

Thursday 13 October 2011

Radar Jammers and Speeding Tickets (Drop and Drag Flash Game - Practice 2)

Hello again, I'm back with another go at making a basic bare-bones drop and drag flash game, which this one is a little more in depth.


Practice 2

After have a go with my first practice, I decide I wanted to have another go with a drag and drop function, except with one that has a hit test feature. So I took a look around on the Web and I found this:

This is the kind of thing I’ve been looking for and could be the very thing I could use to create my game with. The way this is played is by dragging the smaller shapes into the larger shapes. This will give the larger shapes colour fills. Also, when you click on the smaller shapes, where it says “ITEM name,” it will change into the name of the shape. For example, when you click the green square, the “ITEM name” will change to “square.” Not only that, you also have another text box below the ITEM name box; this box basically tells you whether you have put the shapes if you have put it in the right place or not. In this instance: “WRONG!” if you have put it in the wrong place and “CORRECT!!” if you have put it in the right place.

Below that window is a small tutorial on how to make it. I had two attempts at it: The first attempt I did kind of ended in a ‘fail.’ I think what I did wrong is I didn’t put in four separate layers (I know there are four layers because you can download this) so I had second attempt and now it works fine. Following the tutorial this is how I did it:

I opened up a new doc in Adobe Flash.


Next, create four layers:


It’s usually better to have everything separate.

Okay, let’s create our small shapes, then convert them into symbols, (Movie Clips) and give them Instance names. (item1, item2 and item3 in descending order) (the Instance name feature is in the properties window and will only appear if you have a converted symbol selected


Now that you have created your symbols, you now need to make the bigger shapes. When I did this I found it a bit confusing at first but now it should be okay. Before drawing the shapes, you need to create blank symbols first:


Your canvas should now look like this (below)


Once you have drawn your shape within the blank symbol, DO NOT put anything else inside it. Go back to Scene 1, where you left your smaller shapes. After that, go into your Library and drag onto the stage. (make sure that it is in a separate layer, called bigShapes of something like that)


Now that your large shape is on the canvas, double click it so that you are now inside the symbol. Once there, convert the shape into a symbol (Movie Clip) and give it an Instance Name of "shape." Now, create a second layer and draw another shape, exactly the same size and colour, but with no fill, then place it over the colour-filled shape. After that, go back to scene 1.


You need two more large shapes that resemble the smaller shapes. Do this by repeating the same process as the first large shape.

Now, we need to create some text boxes that will feature the item info and whether they are in the right place. (This is basically a Hit Test) To do this, create a blank Symbol and draw two Dynamic text boxes.


Once you have created your new Movie Clip, draw a text box somewhere in the middle of the canvas (make sure it's big enough and the text/typeface is the right size) and write in it "Item name." Since the text box was created inside a blank symbol, there no need to convert it. In the Instance name box, type "itemName_txt." Now, add a second layer and draw another text box, (roughly the same as the first one) inside it, just type three full stops (...) and give it the Instance name of "info_txt."


Go back to scene 1 and drag your new Movie Clip onto the stage. Once you have done that, give it an Instance name of "ilabel" You should now have something like this (below). You are nearly finished, now you need to add the code:

Select the frame you haven't used yet and type this coding in the Actions tab. (if you have not opened it yet, press F9)


Now, run your "game," it should work. (you may need to change the "objNames" (text written in green) to the name of the shapes that you have placed.

Here is the tutorial and source code I found for this game (though I changed it around to make it a little more understanding)

And that is my (well, not mine...) second tutorial in Drop and Drag Flash games. Until next time...

Tuesday 11 October 2011

We survived the Blackout (Drag and Drop Flash Game - Practice)

Hello everyone, I'm back in with another update. Today, I'm gonna show you a small tutorial on how to make a simple drag and drop function in Flash.

OK, before I decide to get straight into making this game, I'm going to have to have a play around with some ActionScript 3 coding. Let's start by opening Flash:

Here's my work area. The blank square in the bottom-right hand corner is my Actions window. If you open up Flash and the Action window is not open, press F9 and it shall appear on your screen. First off, I need to draw some shapes:


Here are two basic squares that I drew in Flash. What I am going to do now is convert them into Movie Clips.

To do this, Left click on the shapes, scroll down to Convert to Symbol, then a pop up box should appear. Call the Movie Clips whatever you like, it doesn't matter, all it does is list them in the Library. The set the shapes to Movie Clips, click on the Drop down menu that says "Type." Then click OK.

Before coding in AS3, you need to give the shapes an Instance Name (note that you won't be able to give the shapes Instance Names straight away. You have to convert them to a symbol first) To give a symbol an Instance Name, go to Properties and then type the name of your symbol. Again, you can call it anything, but this time you can't use CAPS and "underscores" is used for spaces. Now you have Instance Names, it is time to put in some coding: 
Here is a sample of coding. This coding is basically telling the program to move the shapes around by using the mouse. The image below is what will happen when you run the application. You will be able to pick both of these objects on move them around. The blank squares are where the colour squares were before they were moved (These blank squares don't really mean anything. In Flash, when you are drawing an object, you sometimes draw a second one without realizing.)
                           
And that's about it for now. Until next time...